Add New Class Roster
After uploading all of the new accounts for students and teachers for the new school year, an administrator can upload class rosters. Create separate class roster upload files for each school. Add files one time. Adding a file more than once will cause all classes in the file to be duplicated. If changes are need to an existing roster, select the Update Existing Class Roster radio button.
EasyBridge Basic administrators can upload class rosters one time to be used for multiple Savvas learning platforms including Savvas Savvas, andRealize. Teachers need to associate products with classes directly in their Savvas learning platforms.
- Login to Savvas EasyBridge. The Classes page appears.
- Select the Bulk Add/Update Classes tab at the top of the Classes page.
- Select the Add New Class Roster radio button.
Upload guidelines and best practices are located in the middle of the page to help you with the process. If no longer wish to view these, select the - Hide requirements button.
- Scroll to the Upload Your Spreadsheet section.
- Begin typing the school name in the text box under This update will be uploaded to.

- Enter a name tp upload in the Name this upload box.
Select special characters (+ - _ * & @) are acceptable in the file upload name. If a special character is used in the file upload name that is not allowed, a message will display to rename the file.
Use of the following characters is not supported with the Advanced Student Upload, and may result in the error "Failed. Try again."
[ ] < > " \
- Select the Choose File button under Upload your file and select the roster file to upload. A message indicating the file is being transferred and a progress bar displays once the file upload begins.
The maximum file size for a single roster file is 1MB. The user receives an error message if the file exceeds this size.
- Select Upload to upload additional rosters for this same school. To upload rosters for a new school, go back and begin at step 3 to enter a new school.
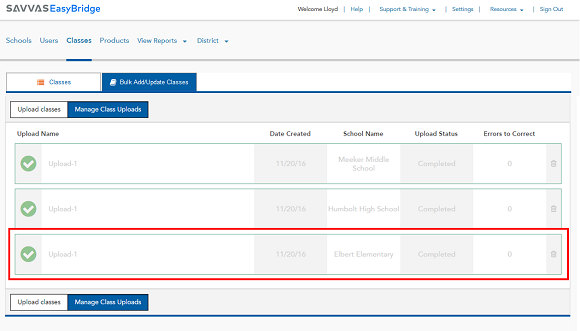
- When the file successfully uploads, the name of the file, date created, completed as the upload status and 0 for Errors to Correct display on the Manage Upload History screen.
- If errors occur during the upload process, correct and re-upload the file.
See Also